Imagine this: You're sitting on a tropical beach, sipping a cold drink, while your Raspberry Pi back home is quietly crunching data, running scripts, and automating tasks like a dream. But wait—what if you need to tweak something or check its status? Enter the magic of free remote login Raspberry Pi! With the right setup, you can access your Raspberry Pi from anywhere in the world without spending a dime. Sounds cool, right?
This guide isn't just about tech jargon and fancy words; it's about empowering YOU to take control of your Raspberry Pi from anywhere, anytime. Whether you're a seasoned pro or a newbie just dipping your toes into the world of Raspberry Pi, this article will walk you through everything you need to know about setting up free remote access. We'll break it down step by step, so even if you're not a coding wizard, you'll still feel like one by the end of this.
But before we dive deep into the nitty-gritty, let's set the stage. Free remote login Raspberry Pi isn't just a tech term—it's a game-changer for hobbyists, developers, and anyone who loves tinkering with tech. Think about it: no more rushing home to fix something or restarting processes manually. With a few clicks, you can manage your Raspberry Pi from your phone, laptop, or tablet, no matter where you are. Let's make this happen!
Read also:Why Ibi Group Architects Is Revolutionizing Modern Design And Sustainability
What is Free Remote Login Raspberry Pi?
Alright, let's start with the basics. A free remote login Raspberry Pi is essentially a way to access your Raspberry Pi remotely, without needing to be physically present. It's like having a virtual key to your digital workshop. Instead of being tied to your desk, you can control, monitor, and interact with your Raspberry Pi from anywhere in the world—all for free. No expensive software, no complicated setups, just pure, unadulterated convenience.
Here's why it matters: In today's fast-paced world, being able to manage your devices remotely is more than just a luxury—it's a necessity. Whether you're running a home automation system, hosting a web server, or just experimenting with cool projects, free remote access gives you the flexibility to stay on top of things without breaking the bank.
Why Choose Free Options Over Paid Services?
Now, you might be wondering, "Why bother with free options when there are paid services out there?" Great question! While paid services like TeamViewer or AnyDesk offer premium features, they often come with subscription fees that can add up over time. On the other hand, free remote login Raspberry Pi solutions are just as effective for most users, minus the financial burden. Plus, many free tools are open-source, meaning they're constantly improved by a global community of developers.
Here's a quick rundown of the benefits:
- No recurring costs—yep, it's completely free!
- Customizable and flexible for your specific needs
- Perfect for hobbyists, students, and small-scale projects
- Easy to set up, even for beginners
How Does Free Remote Login Raspberry Pi Work?
Time for a little tech talk. At its core, free remote login Raspberry Pi works by establishing a secure connection between your Raspberry Pi and another device over the internet. This connection allows you to control your Raspberry Pi's terminal, files, and applications as if you were sitting right in front of it. The most common method involves using SSH (Secure Shell), a protocol designed specifically for secure remote communication.
SSH encrypts all data transmitted between your devices, ensuring that your connection remains private and protected from prying eyes. And the best part? It's already built into most Linux-based systems, including Raspberry Pi OS, so you don't need to install any extra software.
Read also:Unlocking The World Of Xxx Miaz Your Ultimate Guide
Step-by-Step Guide to Setting Up SSH
Ready to roll up your sleeves and get started? Here's a step-by-step guide to setting up SSH for free remote login Raspberry Pi:
- Enable SSH on your Raspberry Pi: Head over to the Raspberry Pi Configuration tool, navigate to the "Interfaces" tab, and enable SSH. Alternatively, you can enable it via the terminal by typing
sudo raspi-configand selecting the SSH option. - Find your Raspberry Pi's IP address: Use the command
ifconfigorip addrto find your Pi's local IP address. This is the address you'll use to connect remotely within your network. - Install an SSH client: On your remote device, download an SSH client like PuTTY (for Windows) or simply use the built-in Terminal app (for macOS and Linux).
- Connect to your Raspberry Pi: Open your SSH client, enter your Raspberry Pi's IP address, and log in using your Pi's username and password.
Voila! You're now connected to your Raspberry Pi remotely. But wait—what if you want to access it outside your local network? That's where things get even more interesting.
Setting Up Port Forwarding for External Access
So, you've mastered SSH and can access your Raspberry Pi within your local network. But what if you want to connect from a coffee shop, a friend's house, or halfway around the world? That's where port forwarding comes in. Port forwarding allows you to route external traffic to your Raspberry Pi's internal IP address, effectively opening a door to your device from the outside world.
Here's how to set it up:
- Log in to your router: Access your router's admin panel by typing its IP address into your browser (usually something like 192.168.0.1 or 192.168.1.1).
- Find the port forwarding section: Look for a tab or menu labeled "Port Forwarding" or "NAT Settings."
- Add a new rule: Create a new rule that forwards incoming traffic on port 22 (the default SSH port) to your Raspberry Pi's internal IP address.
- Save and test: Save your changes and test the connection by using your router's external IP address instead of your local IP.
Pro tip: To make things easier, consider setting up a dynamic DNS service like No-IP or DuckDNS. These services assign a memorable domain name to your router's IP address, so you don't have to remember a string of numbers every time you want to connect.
Exploring Alternative Free Remote Login Raspberry Pi Tools
While SSH is the go-to method for many users, it's not the only game in town. Depending on your needs, you might want to explore other free tools that offer different features and functionalities. Here are a few worth checking out:
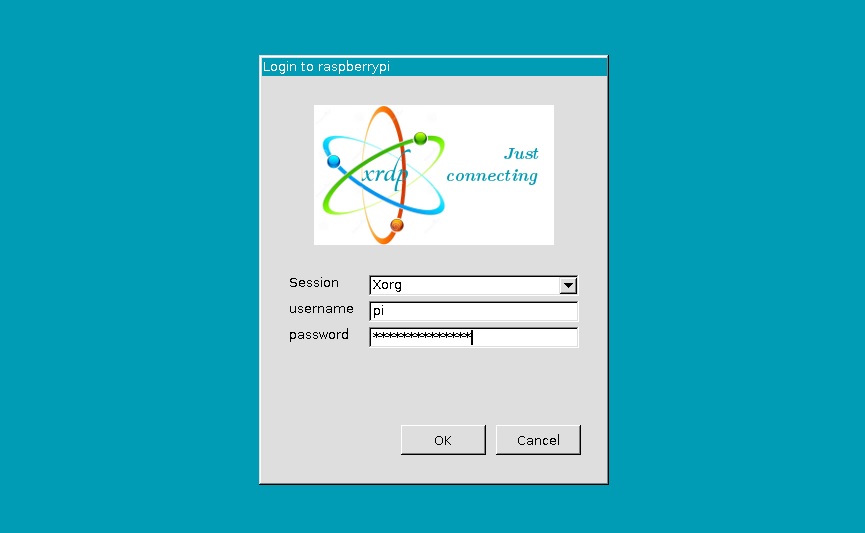
1. VNC (Virtual Network Computing)
VNC allows you to access your Raspberry Pi's graphical desktop interface remotely. Unlike SSH, which gives you command-line access, VNC lets you interact with your Pi as if you were using a physical monitor, keyboard, and mouse.
2. Web-Based Interfaces
If you're running a web server on your Raspberry Pi, you can often access it directly through a browser. This method is perfect for managing websites, databases, or media servers without needing additional software.
3. OpenSSH with SSH Keys
For an extra layer of security, consider using SSH keys instead of passwords. This method eliminates the risk of brute-force attacks and makes your connection even more secure.
Top Tips for Securing Your Free Remote Login Raspberry Pi
Security should always be a top priority when setting up remote access. After all, you don't want unauthorized users gaining access to your Raspberry Pi and wreaking havoc. Here are some tips to keep your setup safe:
- Change the default SSH port: Instead of using port 22, switch to a non-standard port to deter automated attacks.
- Use strong passwords: Avoid using common passwords or phrases. Opt for a mix of letters, numbers, and symbols.
- Enable two-factor authentication (2FA): Add an extra layer of protection by requiring a second form of verification.
- Regularly update your software: Keep your Raspberry Pi OS and all installed packages up to date to patch any security vulnerabilities.
By following these best practices, you can enjoy the convenience of free remote login Raspberry Pi without compromising your security.
Real-World Applications of Free Remote Login Raspberry Pi
Now that you know how to set it up, let's talk about the cool things you can do with free remote login Raspberry Pi. From automating mundane tasks to building complex projects, the possibilities are endless. Here are a few ideas to inspire you:
1. Home Automation
Use your Raspberry Pi to control smart devices, monitor energy usage, or automate lighting schedules—all from the comfort of your couch or halfway around the globe.
2. Media Server
Turn your Raspberry Pi into a personal media server, streaming movies, music, and photos to all your devices, no matter where you are.
3. Web Development
Host a personal website, blog, or development environment on your Raspberry Pi and manage it remotely with ease.
Common Issues and Troubleshooting
Even the best-laid plans can sometimes hit a snag. Here are some common issues you might encounter when setting up free remote login Raspberry Pi, along with solutions to help you troubleshoot:
1. Connection Refused
Cause: SSH is not enabled or the IP address is incorrect.
Solution: Double-check that SSH is enabled and verify the IP address you're using.
2. Permission Denied
Cause: Incorrect username or password.
Solution: Ensure you're using the correct login credentials and check for typos.
3. Port Forwarding Not Working
Cause: Incorrect router settings or firewall blocking.
Solution: Verify your port forwarding rules and temporarily disable your firewall to test the connection.
Conclusion: Take Control of Your Raspberry Pi Anywhere, Anytime
There you have it—a comprehensive guide to mastering free remote login Raspberry Pi. Whether you're a tech enthusiast, a DIY hobbyist, or just someone looking to simplify their life, this skill can open up a world of possibilities. By following the steps outlined in this article, you can unlock the full potential of your Raspberry Pi and enjoy the freedom to manage it from anywhere in the world.
So, what are you waiting for? Grab your Raspberry Pi, roll up your sleeves, and start exploring the endless opportunities that free remote access offers. And don't forget to share your experiences, tips, and tricks in the comments below. Together, we can build a community of Raspberry Pi enthusiasts who empower each other to achieve greatness. Happy tinkering!
Table of Contents
- What is Free Remote Login Raspberry Pi?
- Why Choose Free Options Over Paid Services?
- How Does Free Remote Login Raspberry Pi Work?
- Step-by-Step Guide to Setting Up SSH
- Setting Up Port Forwarding for External Access
- Exploring Alternative Free Remote Login Raspberry Pi Tools
- Top Tips for Securing Your Free Remote Login Raspberry Pi
- Real-World Applications of Free Remote Login Raspberry Pi
- Common Issues and Troubleshooting
- Conclusion